Content
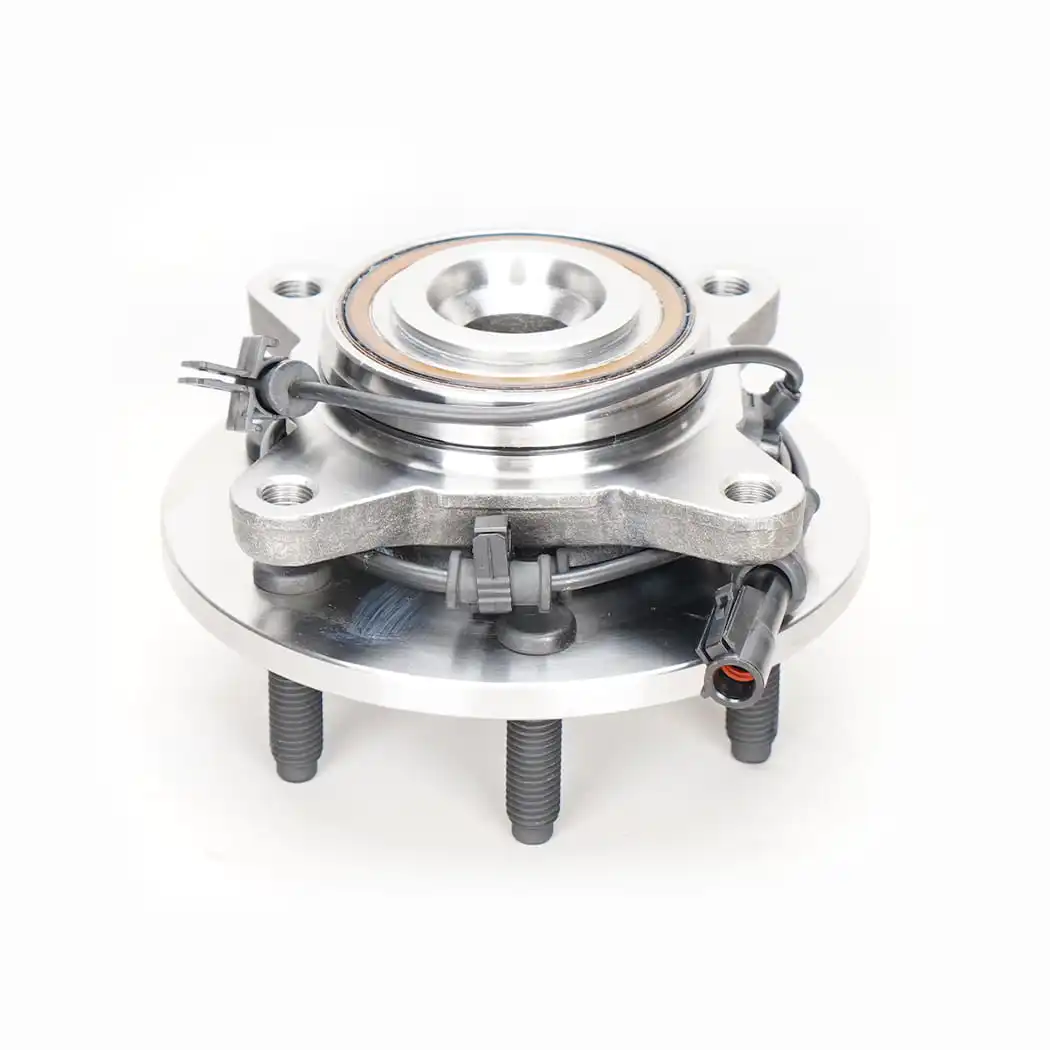
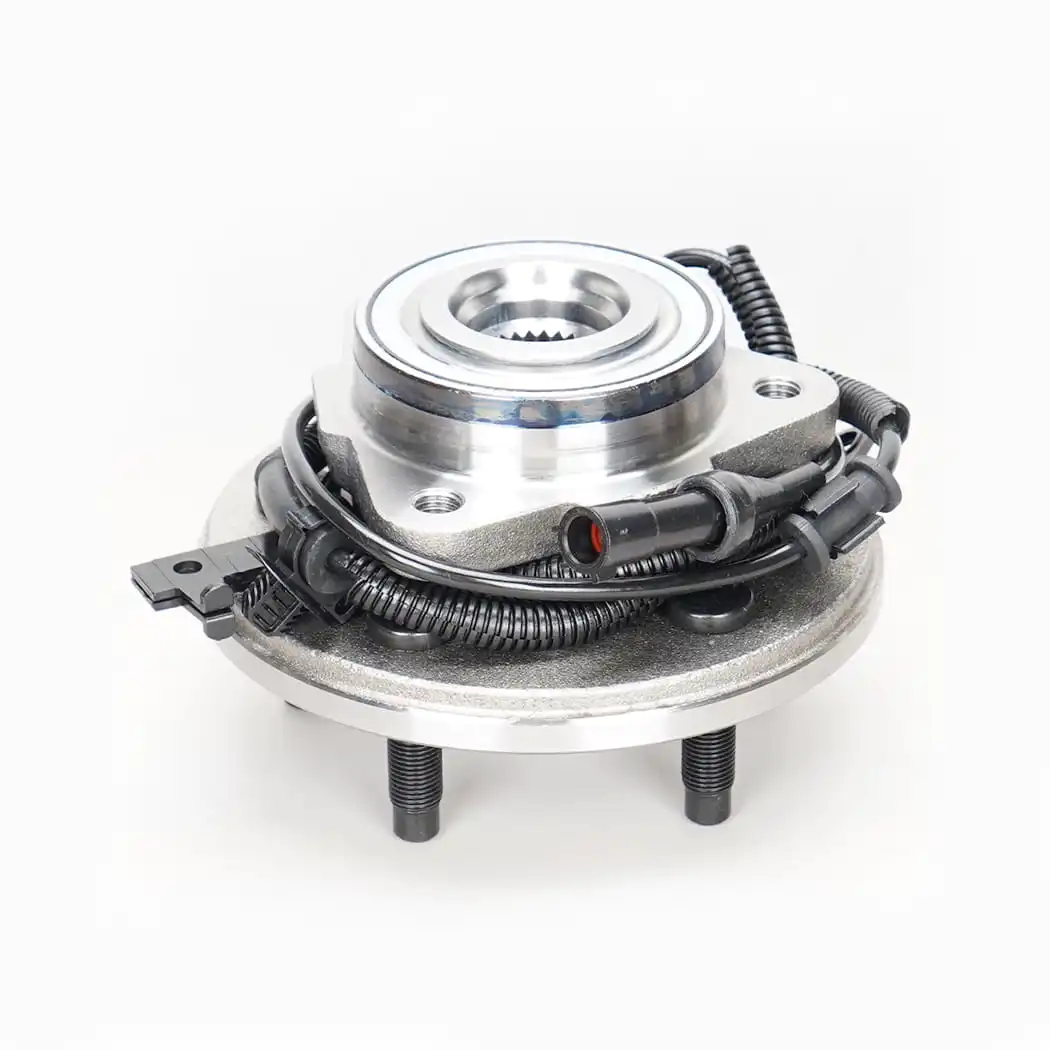
The front hub assembly — also called the front wheel hub assembly or front hub bearing assembly — is the component that connects your vehicle's front wheels to the steering knuckle and suspension system. At its core, the hub assembly is a precision-engineered unit that allows the wheel to spin freely while simultaneously supporting the full weight of the front of the vehicle, transmitting braking forces, and in the case of front-wheel-drive and all-wheel-drive vehicles, transferring engine torque to the road surface.
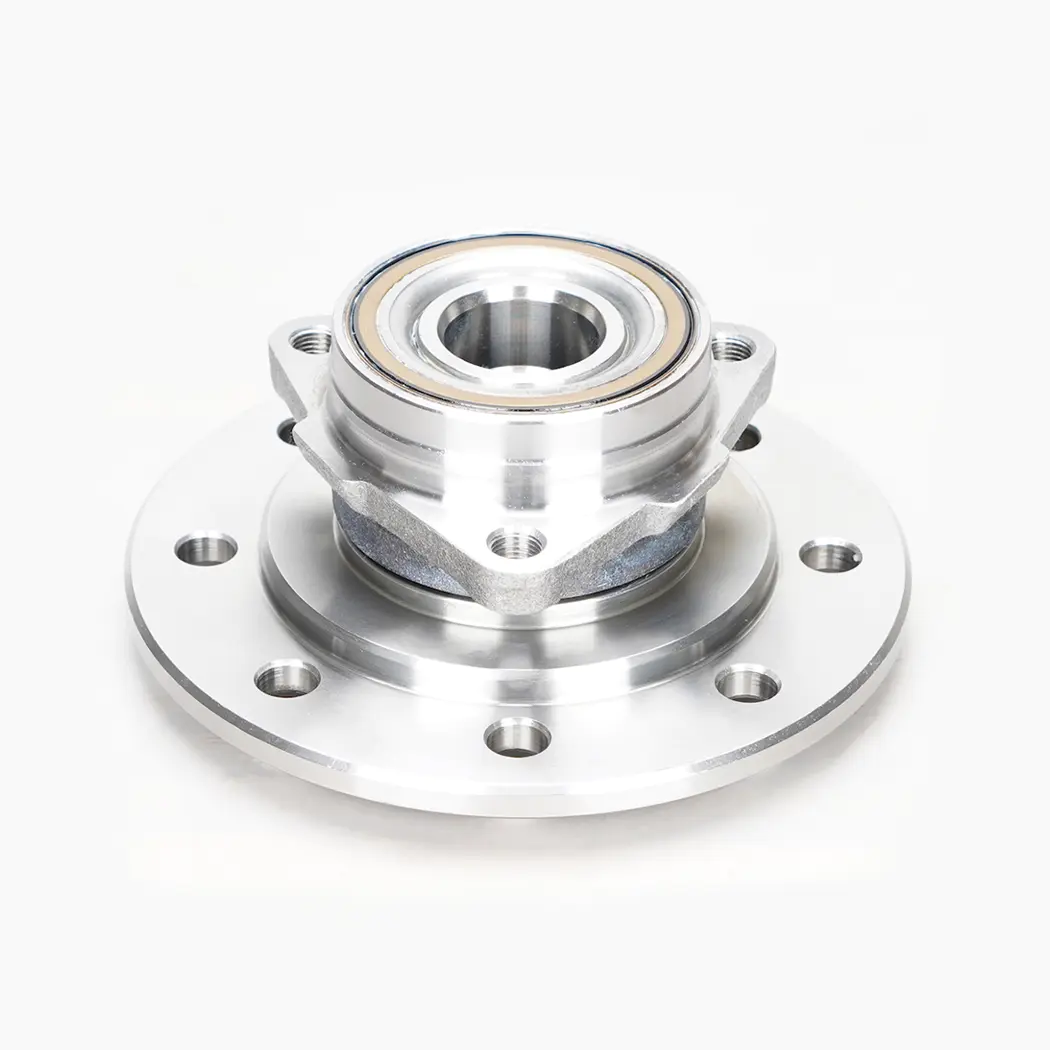
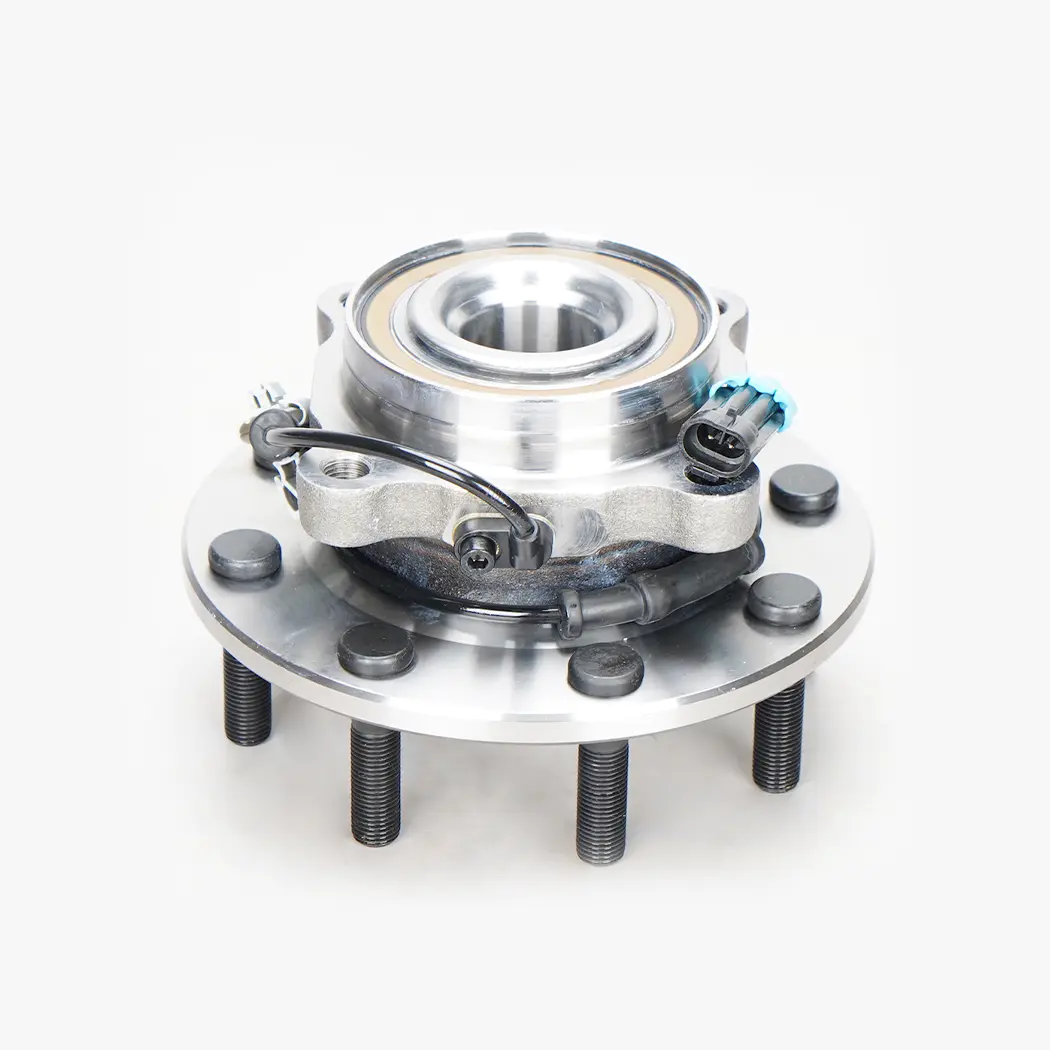
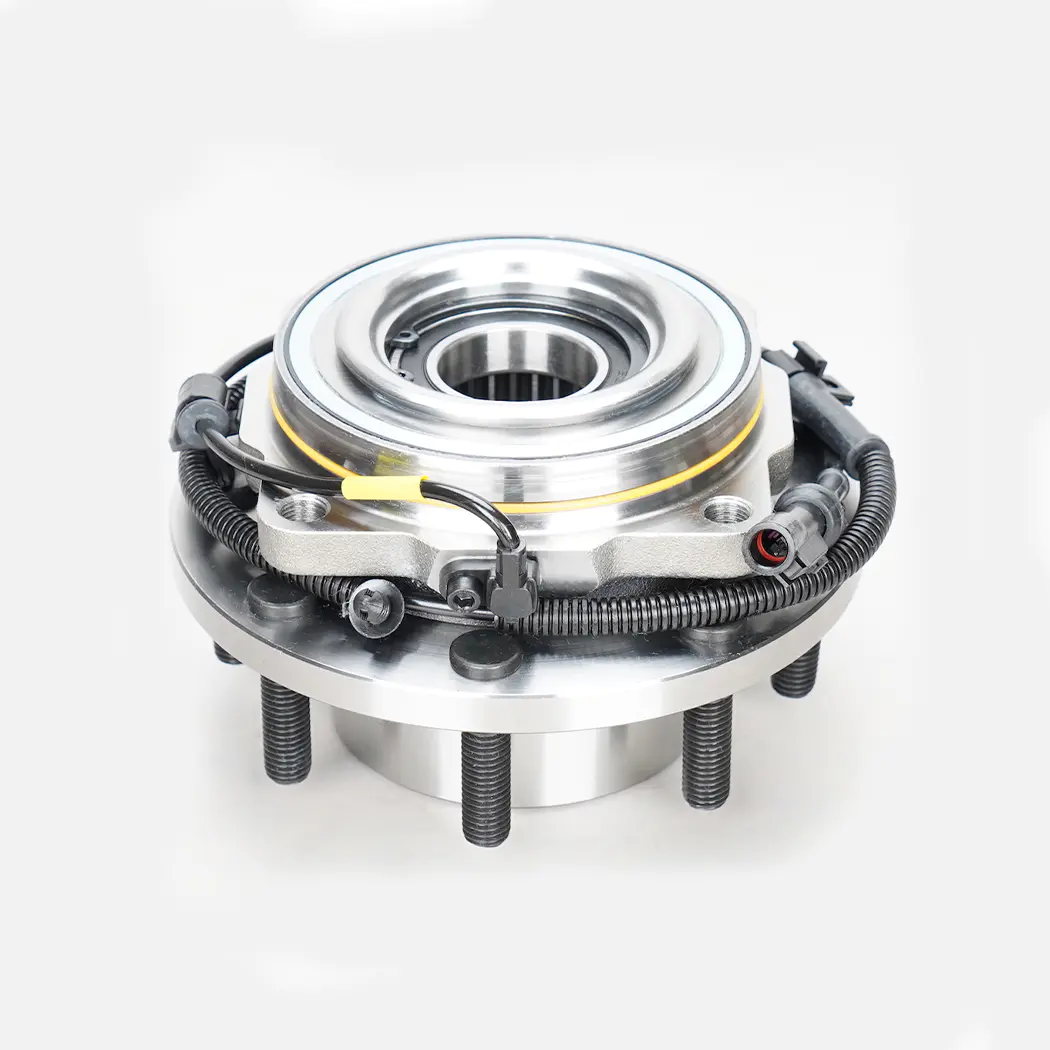
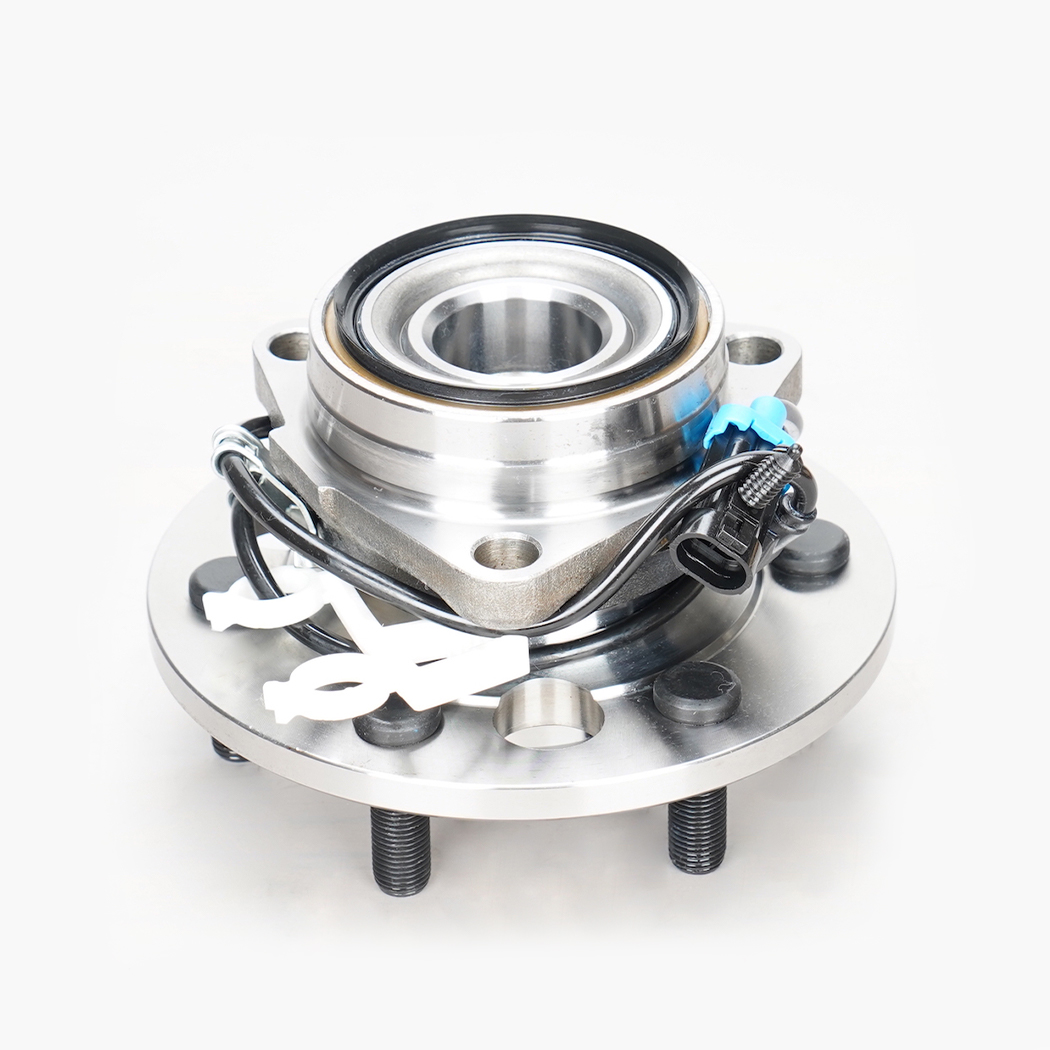
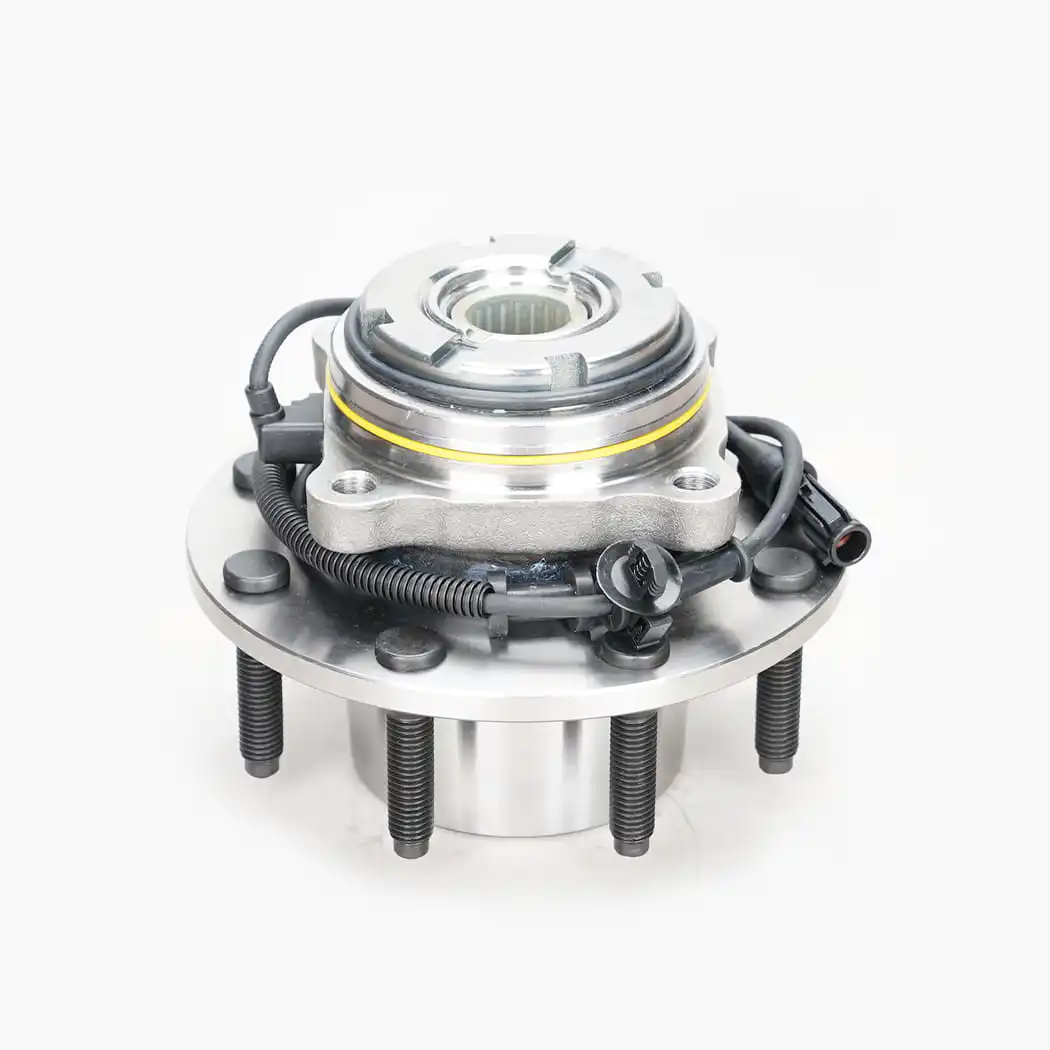
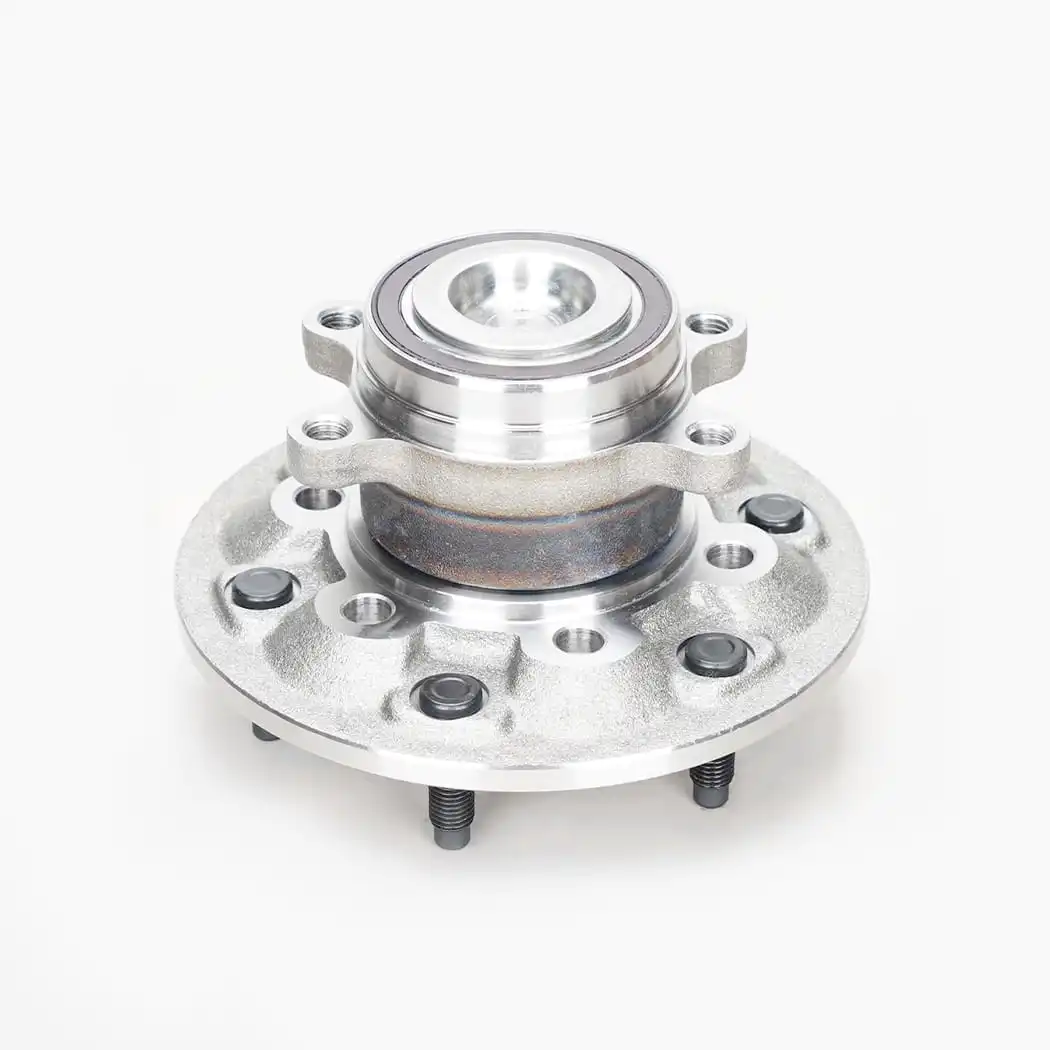
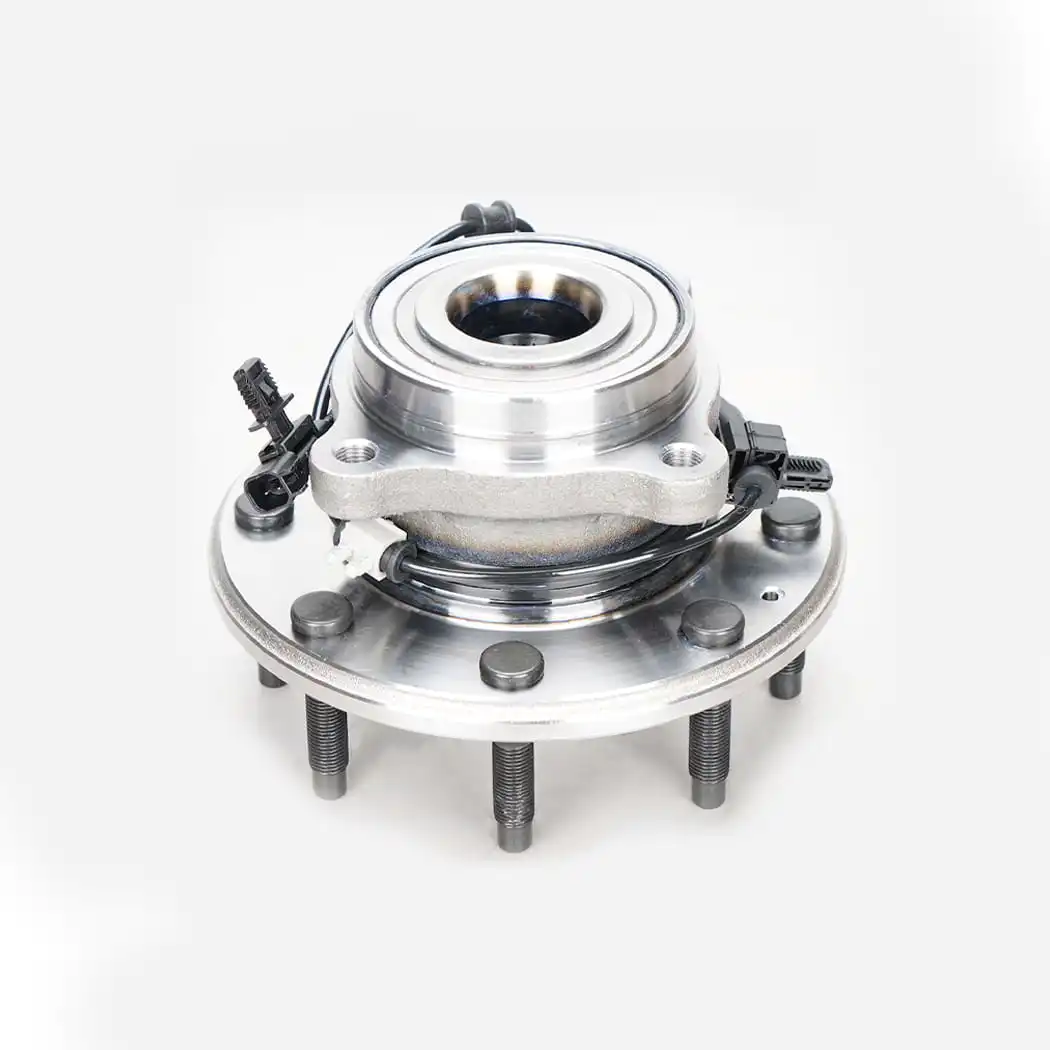
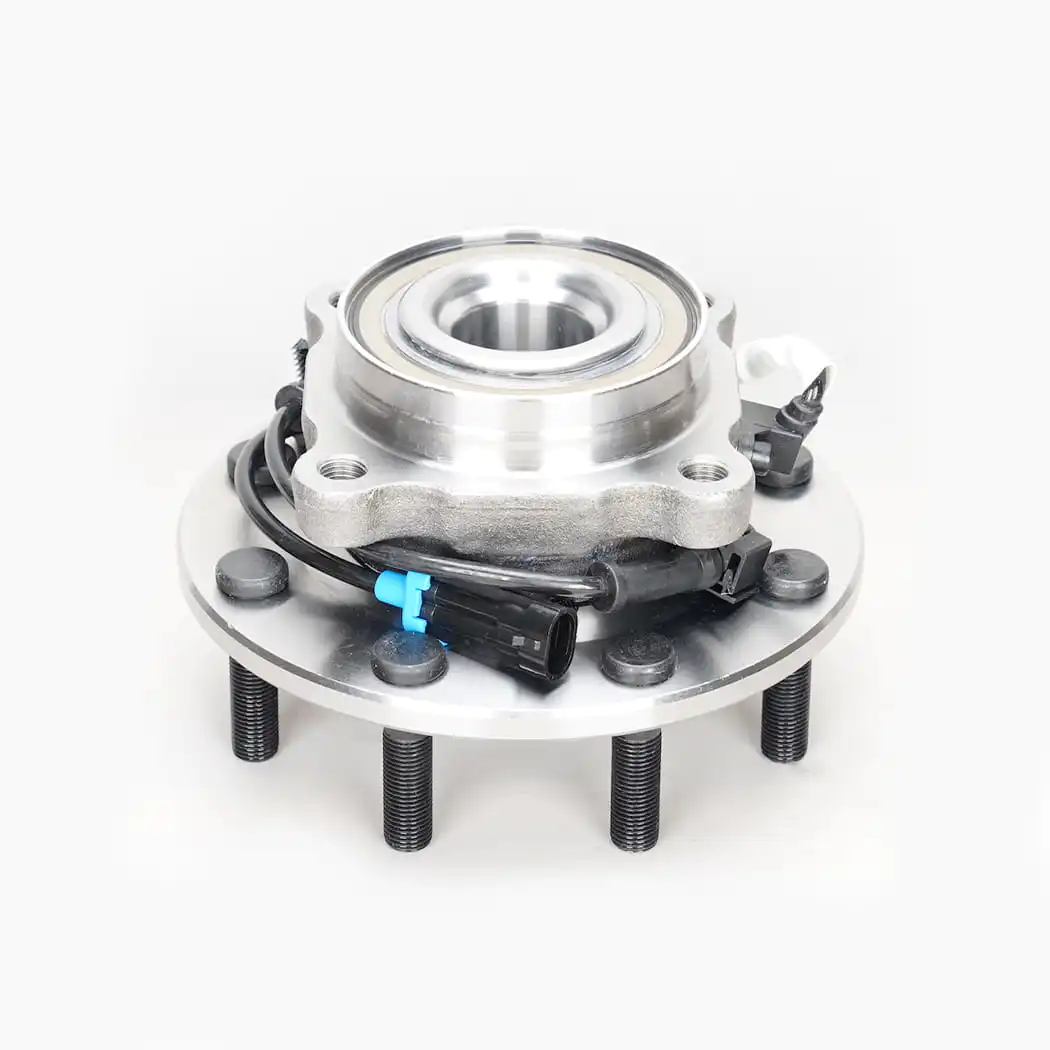
Modern front hub assemblies are typically sold and installed as a single pre-assembled unit that integrates several components that used to be serviced individually. The assembly typically includes the hub flange (the mounting surface your wheel bolts onto), the wheel bearing (usually a double-row angular contact ball bearing or tapered roller bearing), the bearing races, seals to keep grease in and contaminants out, and in most late-model vehicles, an ABS tone ring that works with the wheel speed sensor to provide anti-lock braking and traction control data to the vehicle's ECU. Some assemblies also incorporate the wheel speed sensor itself, making the unit a fully integrated module.
This integrated design is a significant improvement over the older serviceable bearing design, where technicians had to disassemble the hub, clean and inspect the races, repack bearings with grease, and set preload manually — a process that required skill and experience to do correctly. The modern front axle hub assembly is a sealed, pre-greased, pre-set unit that requires no adjustment and installs in a fraction of the time. The trade-off is that when it fails, you replace the entire assembly rather than just the bearing, but the time and labor savings usually make this a worthwhile trade.
Front wheel hub assembly failure rarely happens without warning. The symptoms are typically gradual at first — easy to dismiss as road noise or tire noise — but they become progressively worse and eventually dangerous if ignored. Knowing how to distinguish a failing hub assembly from other common automotive issues is the first step toward catching the problem before it puts you at risk on the road.
The most classic and common symptom of a worn front hub bearing assembly is a grinding, humming, or rumbling noise that changes in character with vehicle speed. Unlike tire noise, which is relatively constant in pitch, hub bearing noise typically increases in intensity as speed increases and may change pitch or volume when you shift your weight from side to side — for example, during a gentle lane change. If the noise gets louder when you turn left and quieter when you turn right (or vice versa), that directional change indicates a specific side: noise that increases during a left turn points to a failing right-front hub; noise that worsens during a right turn points to the left front. This happens because turning shifts the lateral load onto the opposite bearing.
As the front wheel bearing hub assembly wears, the internal bearing clearance increases. This excess play can translate into a vibration felt through the steering wheel, particularly at highway speeds. In more advanced cases, the looseness becomes noticeable as a vague or wandering steering feel — the steering wheel feels imprecise or requires constant small corrections to maintain a straight line. This symptom is often mistaken for wheel balance or alignment issues, but if balance and alignment checks come back normal, the hub assembly should be your next suspect.
Because the ABS tone ring is integrated into most modern front hub assemblies, bearing wear can cause the tone ring to wobble or the gap between the tone ring and speed sensor to become inconsistent. This produces erratic or absent wheel speed signals, which the vehicle's ECU interprets as a wheel speed sensor fault — triggering the ABS warning light and potentially disabling traction control and stability control systems. If you have an ABS light combined with any noise from the wheel area, scan for fault codes before replacing the wheel speed sensor; the actual cause is often the hub assembly itself.
Excessive play in a worn front axle hub assembly can cause the wheel to run at a very slight angle relative to the vehicle centerline — not enough to be visually obvious, but enough to produce abnormal tire wear patterns over time. If you're seeing cupping, scalloping, or one-sided wear on a front tire that your alignment report doesn't fully explain, inspect the hub assembly for play as part of your diagnosis.
With the vehicle safely lifted on jack stands, grab the tire at the 12 o'clock and 6 o'clock positions and attempt to rock it in and out. Any detectable play or clunking indicates worn hub bearing clearance. Then grab the tire at the 3 o'clock and 9 o'clock positions and repeat — movement here can indicate tie rod or ball joint issues in addition to or instead of hub wear. A healthy front hub assembly should have essentially zero detectable play in either direction when checked this way.
Understanding what degrades a front wheel hub assembly helps you extend service life and avoid premature replacements. Several factors accelerate wear beyond normal mileage-related deterioration:
A quality OEM or premium aftermarket front wheel hub assembly on a typical passenger vehicle will generally last between 85,000 and 150,000 miles (approximately 135,000 to 240,000 km) under normal operating conditions. However, this range has significant variance depending on vehicle type, driving environment, and the quality of the replacement parts used. SUVs and trucks, which carry more weight and often see more varied terrain, may see hub assemblies wear out closer to the 80,000–100,000 mile mark. High-performance vehicles with wider tires and more aggressive cornering loads may also see shorter life. Budget or low-quality replacement assemblies — common on the lower end of the aftermarket — frequently fail within 30,000–50,000 miles, making price-based purchasing decisions a false economy in this component category.
The replacement front hub assembly market is enormous, with options ranging from genuine OEM parts sourced from the vehicle manufacturer to a broad spectrum of aftermarket products at varying price points. Choosing correctly requires understanding what you're comparing:
| Category | Quality Level | Typical Price Range | Best For |
| Genuine OEM | Highest — exact factory specification | $150–$400+ | Newer vehicles under warranty, precision-critical applications, owner preference for factory spec |
| OE-Supplier Aftermarket (e.g., SKF, Timken, Moog, FAG) | Very high — often made by same manufacturers that supply OEM | $80–$250 | Best value for most repair scenarios; matches or exceeds OEM life expectancy |
| Mid-Range Aftermarket | Good — meets most OEM tolerances | $50–$120 | Older vehicles, budget-conscious repairs; acceptable if from a recognized brand |
| Budget / No-Name Aftermarket | Variable — often well below OEM tolerance | $20–$60 | Generally not recommended; high failure rates and short service life reported widely |
For most drivers, purchasing a front axle hub assembly from a reputable OE-supplier brand is the sweet spot — you get quality that matches or approaches OEM specification at a meaningfully lower price. Brands like SKF, Timken, Moog, FAG (Schaeffler), NSK, and Raybestos have long track records in this space and are widely trusted by professional mechanics. The key check when buying is to verify that the replacement includes the ABS tone ring if your vehicle requires it, and that the bolt pattern, spline count (for driven hubs), and flange diameter match your vehicle's specifications exactly.

Front wheel hub assembly replacement is a moderately advanced DIY job — within the capabilities of a competent home mechanic with the right tools, but beyond the comfort zone of a beginner. Here's a realistic overview of the process so you know what's involved, whether you're doing it yourself or supervising the work at a shop.
Begin by loosening the lug nuts and the axle nut while the vehicle is still on the ground — the weight of the vehicle prevents the hub from rotating while you break these loose. The axle nut in particular requires significant torque to loosen and is best handled with an impact wrench. Once the vehicle is safely lifted and supported on jack stands, remove the wheel completely.
With the wheel off, you'll need to create enough slack in the brake system to work around it — on most vehicles this means removing the brake caliper (without letting it hang by the brake hose — support it with a hook or wire), sliding off the brake rotor, and in some cases disconnecting the ABS wheel speed sensor harness if it's routed in a way that would be strained during hub removal. Take photos of routing and connections before disconnecting anything.
The front hub bearing assembly is typically bolted to the steering knuckle from behind with three or four bolts. On front-wheel-drive vehicles, the CV axle shaft passes through the center of the hub, so you'll need to push the axle shaft inward slightly to free the hub's splined bore from the axle. Remove the hub bolts and carefully work the old hub assembly off the knuckle. It's not unusual for the hub to be seized onto the knuckle due to rust, especially on older vehicles — this is where penetrating oil and patience (and sometimes a hub puller) become necessary.
Before installing the new front hub assembly, thoroughly clean the mating surface on the knuckle with a wire brush to remove rust and debris. Any rust scale left on the mounting face will prevent the hub from seating flat, creating runout that causes brake pedal pulsation and uneven rotor wear. Apply a thin coat of anti-seize to the knuckle bore to ease future removal, then position the new hub assembly and start all bolts by hand before tightening any of them. Torque the hub bolts to spec in a star pattern, reassemble the brake components, and torque the axle nut to the manufacturer's specification using your torque wrench — this is not a step to estimate. Reinstall the wheel, lower the vehicle, and torque the lug nuts to spec.
This is one of the most common questions that comes up around front wheel bearing hub assembly replacement, and the answer depends on the situation. Unlike brake pads — where replacing both sides at once is strongly recommended to maintain even braking force — hub assemblies don't have the same hard rule. If only one side shows symptoms, you don't have to automatically replace the other. However, there are situations where doing both makes sense:
If the opposite hub tests completely clean with no play, no noise, and the vehicle has relatively low mileage, there's no compelling reason to replace a part that isn't failing. Use your diagnostic findings to make the call, not a blanket policy.
Torque specifications for front hub assembly installation are not suggestions — they are engineering requirements that directly affect bearing preload, component life, and driving safety. Here are the key torque values that must be set correctly during installation, with typical ranges (always verify your vehicle-specific values in a service manual or manufacturer data):
| Fastener | Typical Torque Range | Notes |
| Hub-to-Knuckle Bolts | 70–100 ft-lbs (95–135 Nm) | Torque in star pattern; use thread locker if specified |
| Axle / Hub Nut | 130–250 ft-lbs (175–340 Nm) | Vehicle-specific; many are single-use — replace, don't reuse |
| Brake Caliper Bolts | 25–85 ft-lbs (34–115 Nm) | Wide range by vehicle; confirm your specific value |
| Wheel Lug Nuts | 80–120 ft-lbs (108–163 Nm) | Torque in star pattern; re-check after 50–100 miles |
Never use an impact wrench to final-torque the axle nut or hub bolts — use a calibrated torque wrench. The axle nut in particular must be torqued precisely: too loose and the bearing runs with excess endplay; too tight and you're imposing preload that accelerates wear and heat generation. If your vehicle uses a castellated axle nut with a cotter pin, always install a new cotter pin after torquing — never reuse the old one.
After investing in a quality front wheel hub assembly and proper installation, a few habits and practices will help you get maximum life from the new component:
• ADD: 42705 Grand River Avenue, Suite 201, Novi. Michigan 48375, USA.
© Copyright 2017 HANGZHOU HANJI AUTO PARTS.CO.,LTD. All Rights Reserved. Wheel Hub Unit Manufacturer