Content
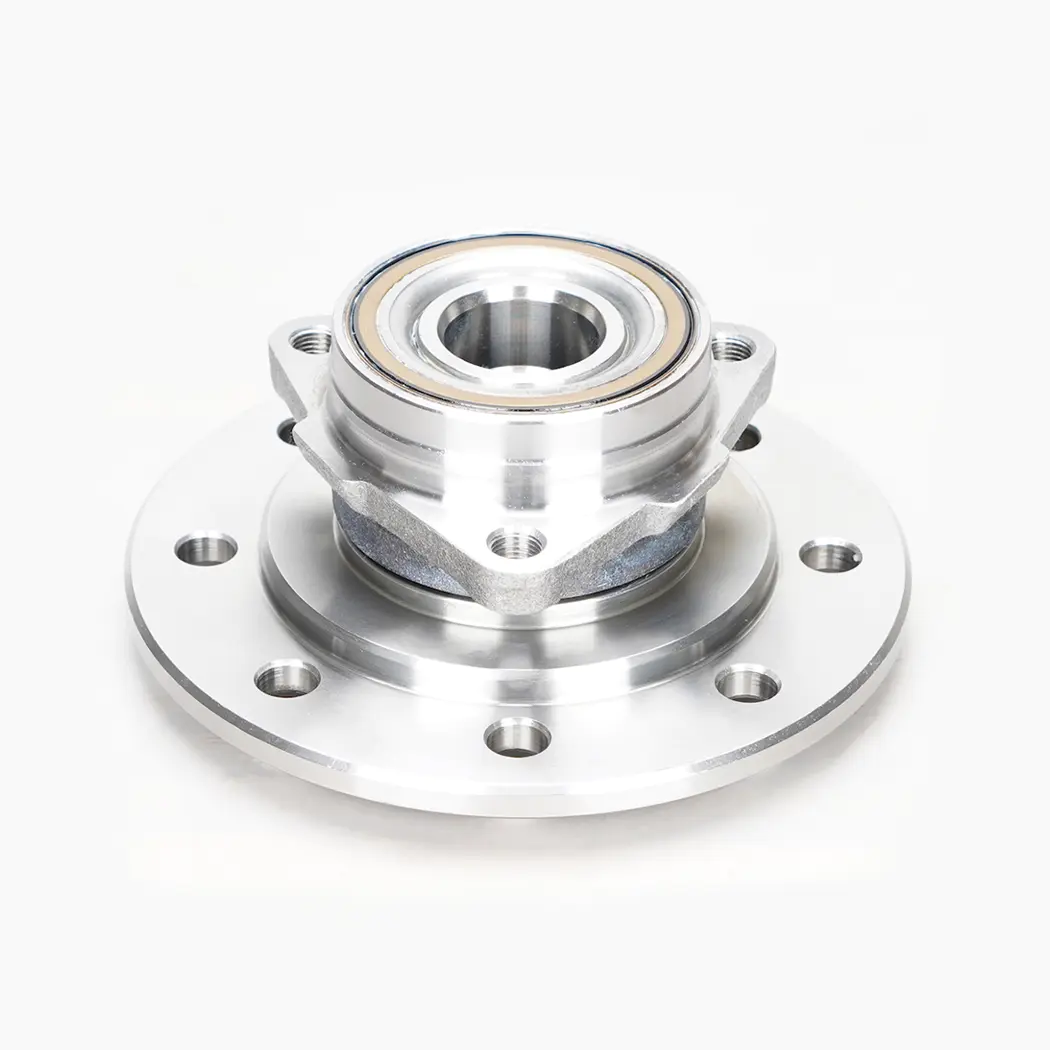
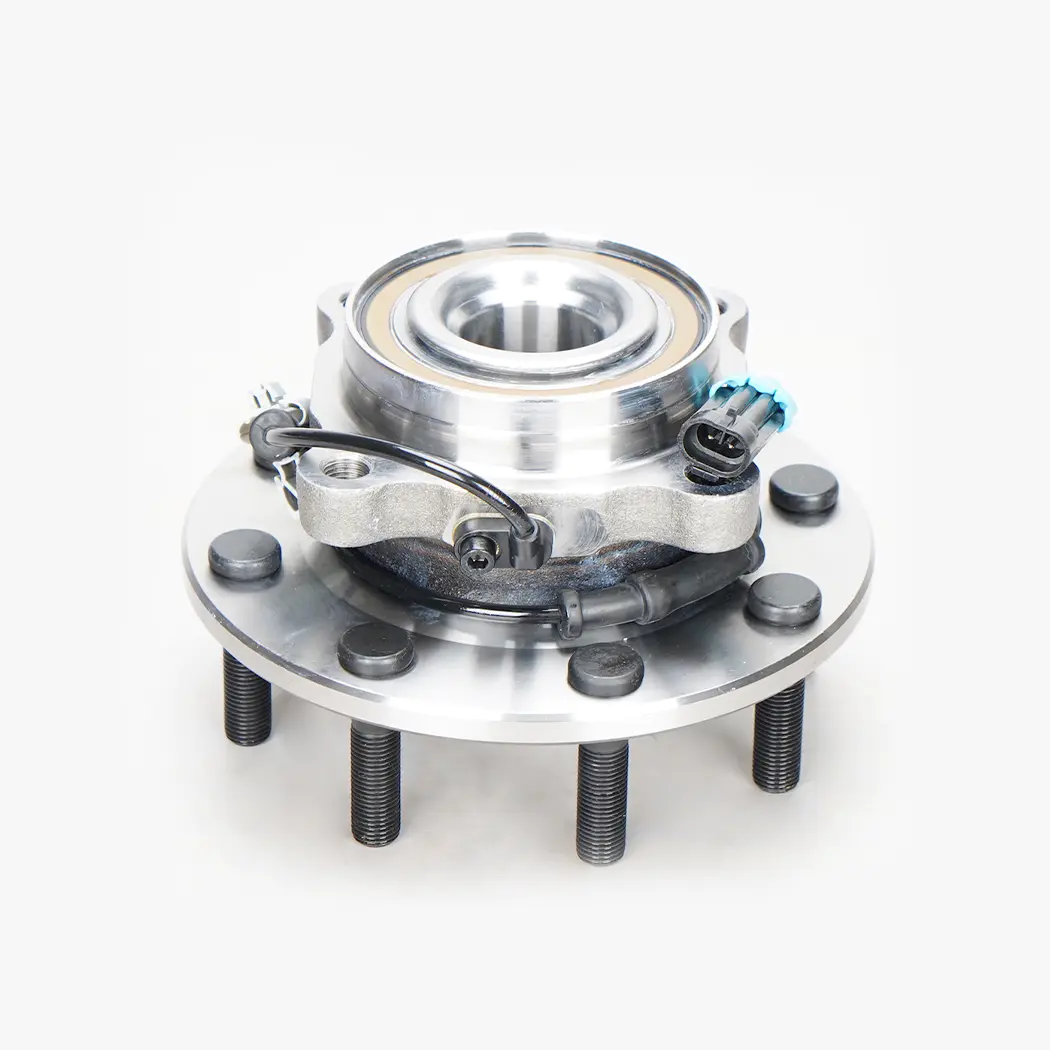
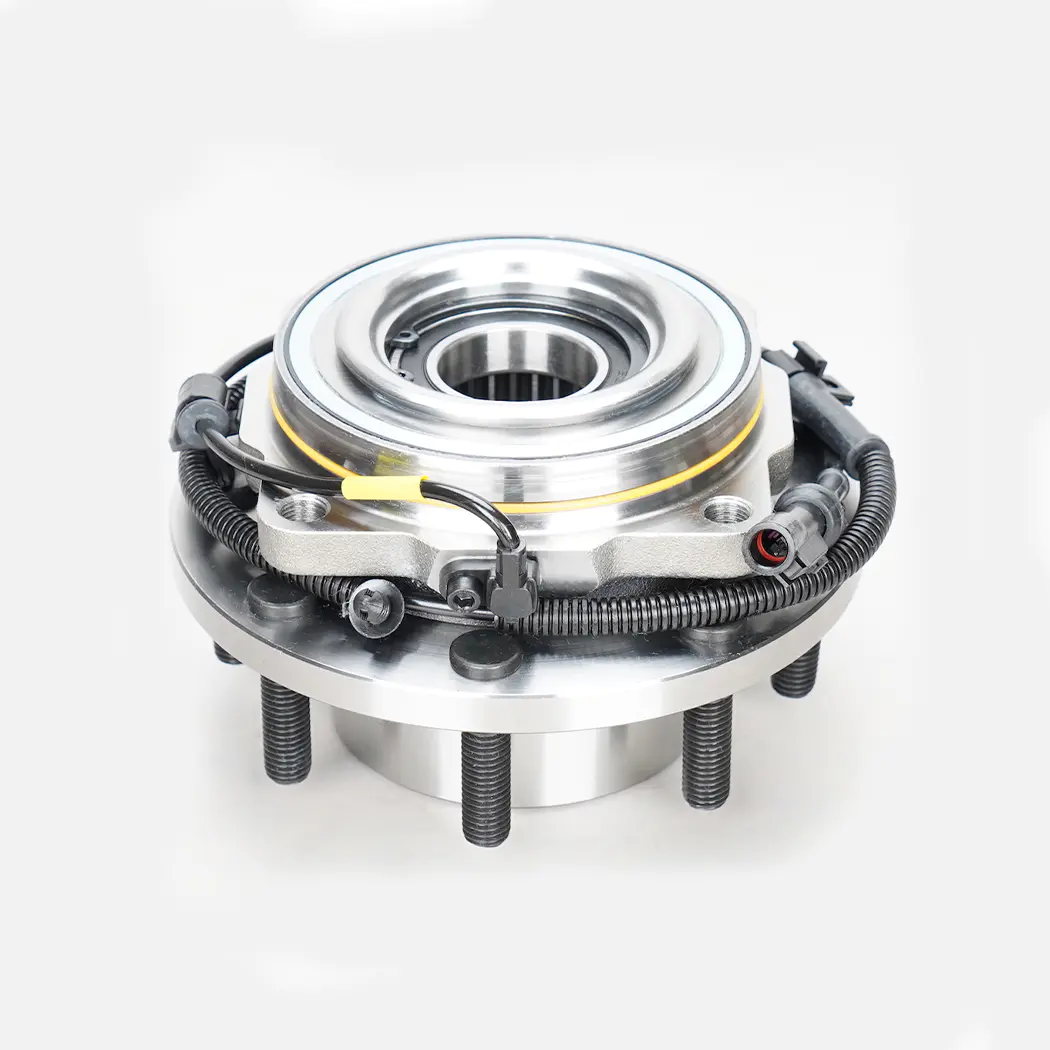
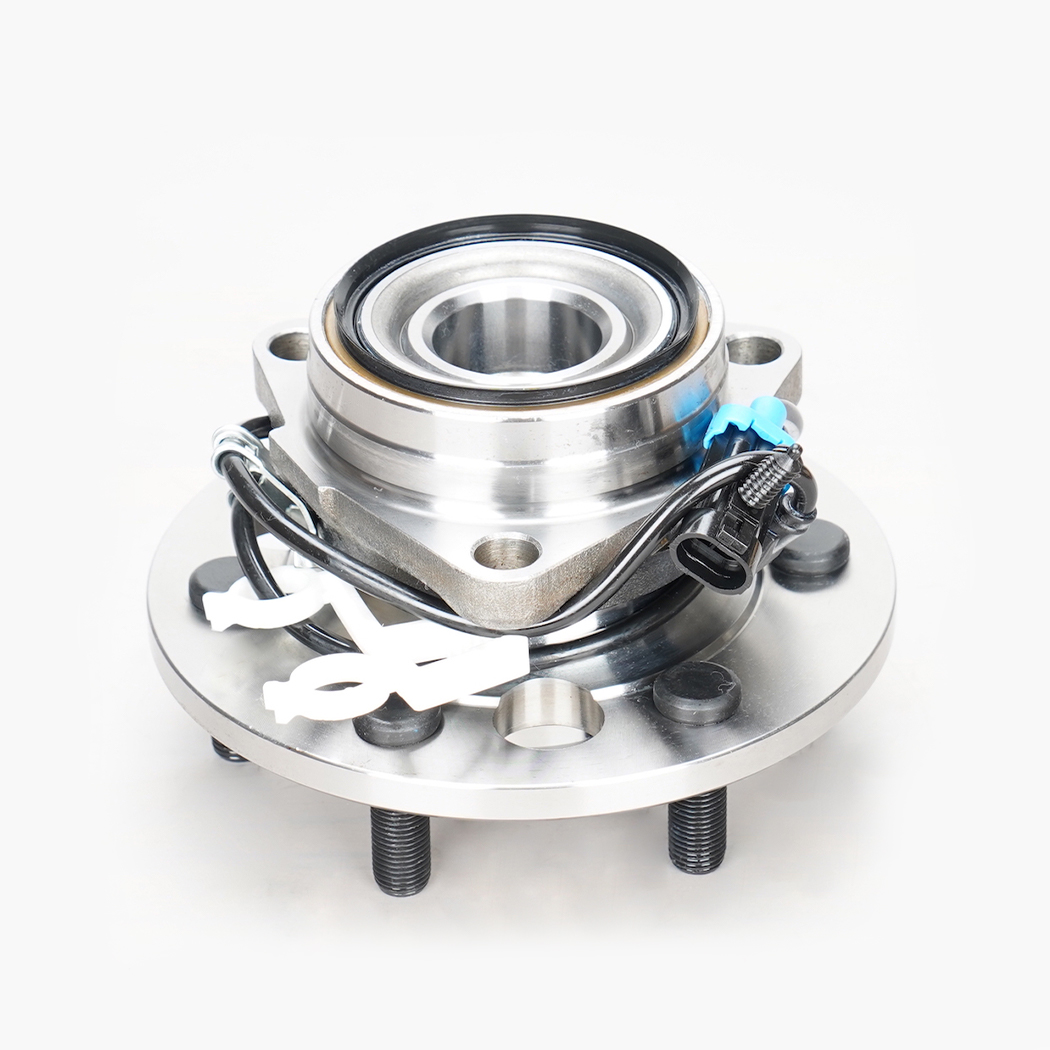
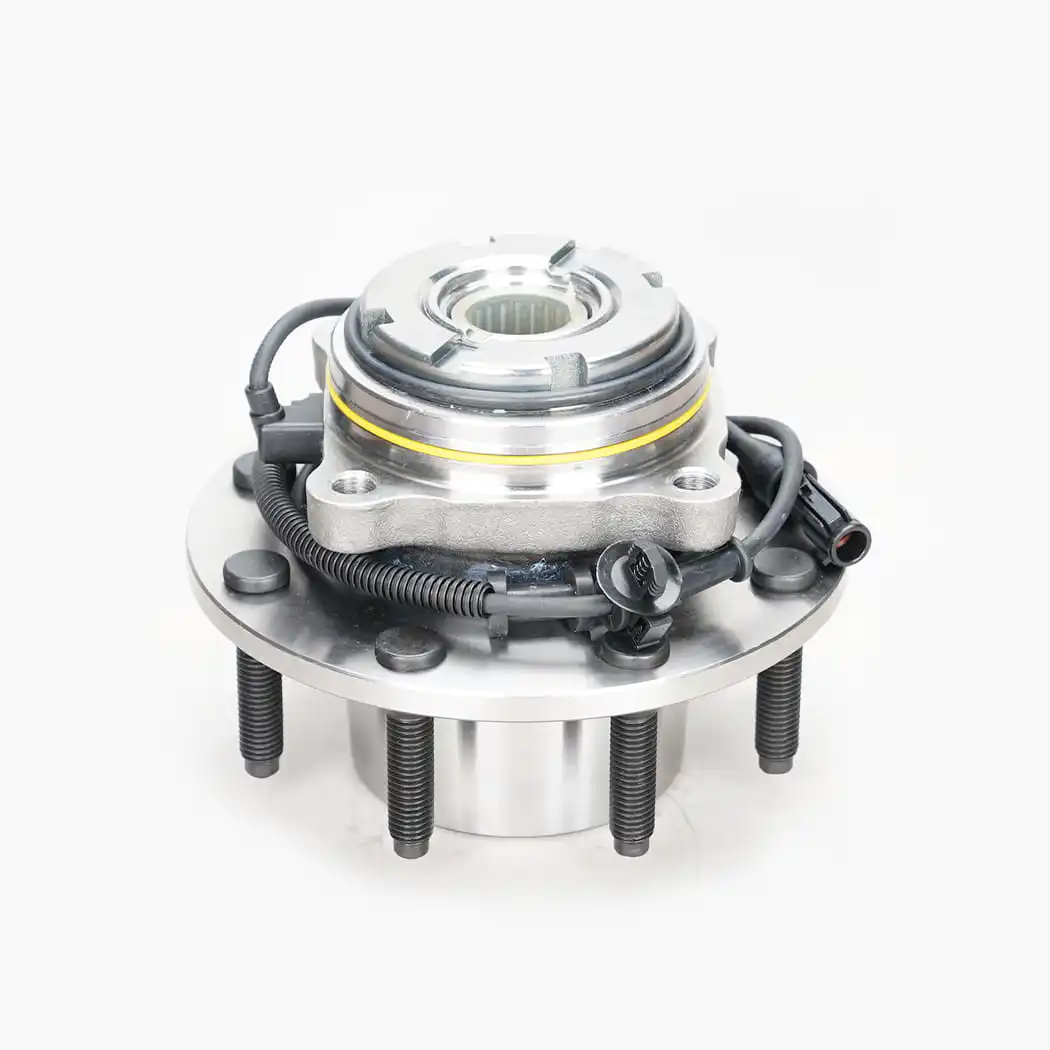
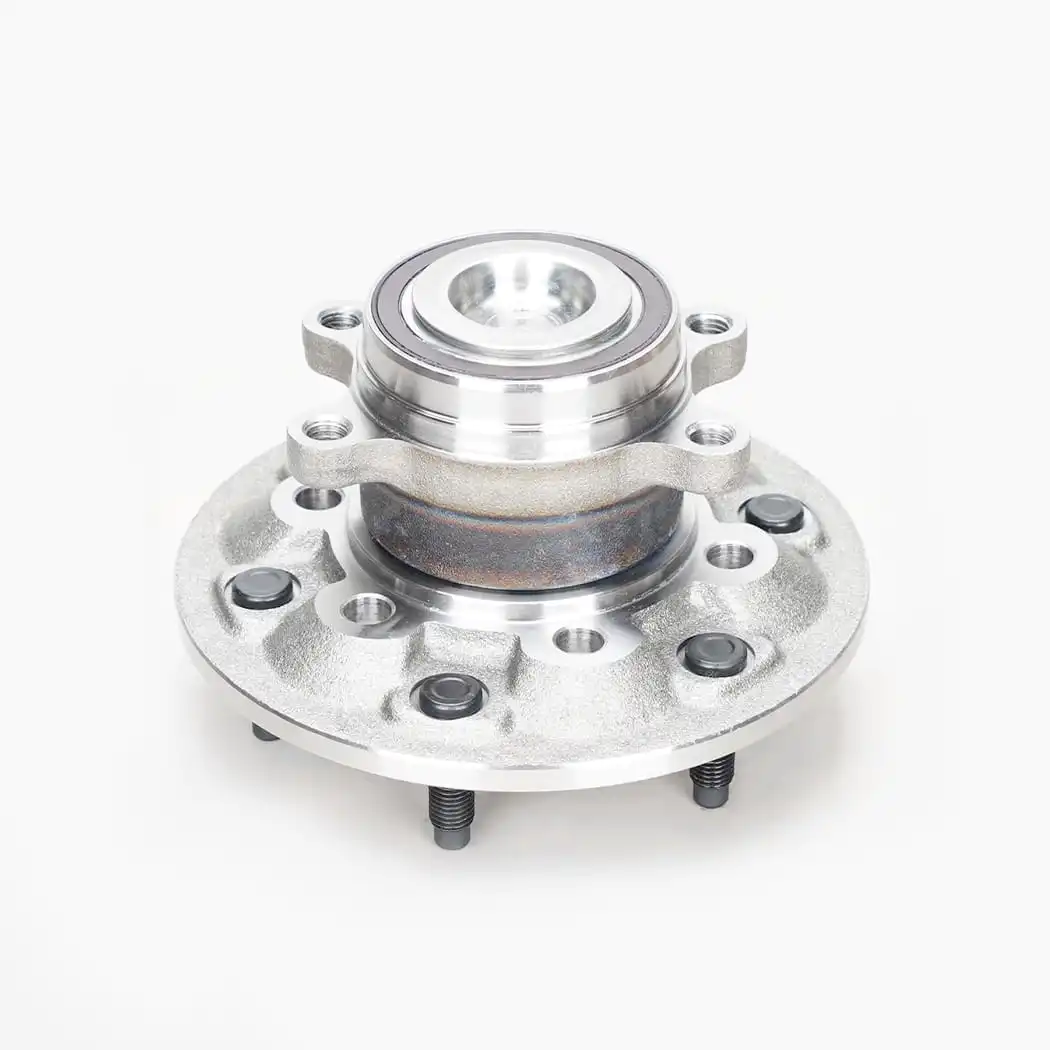
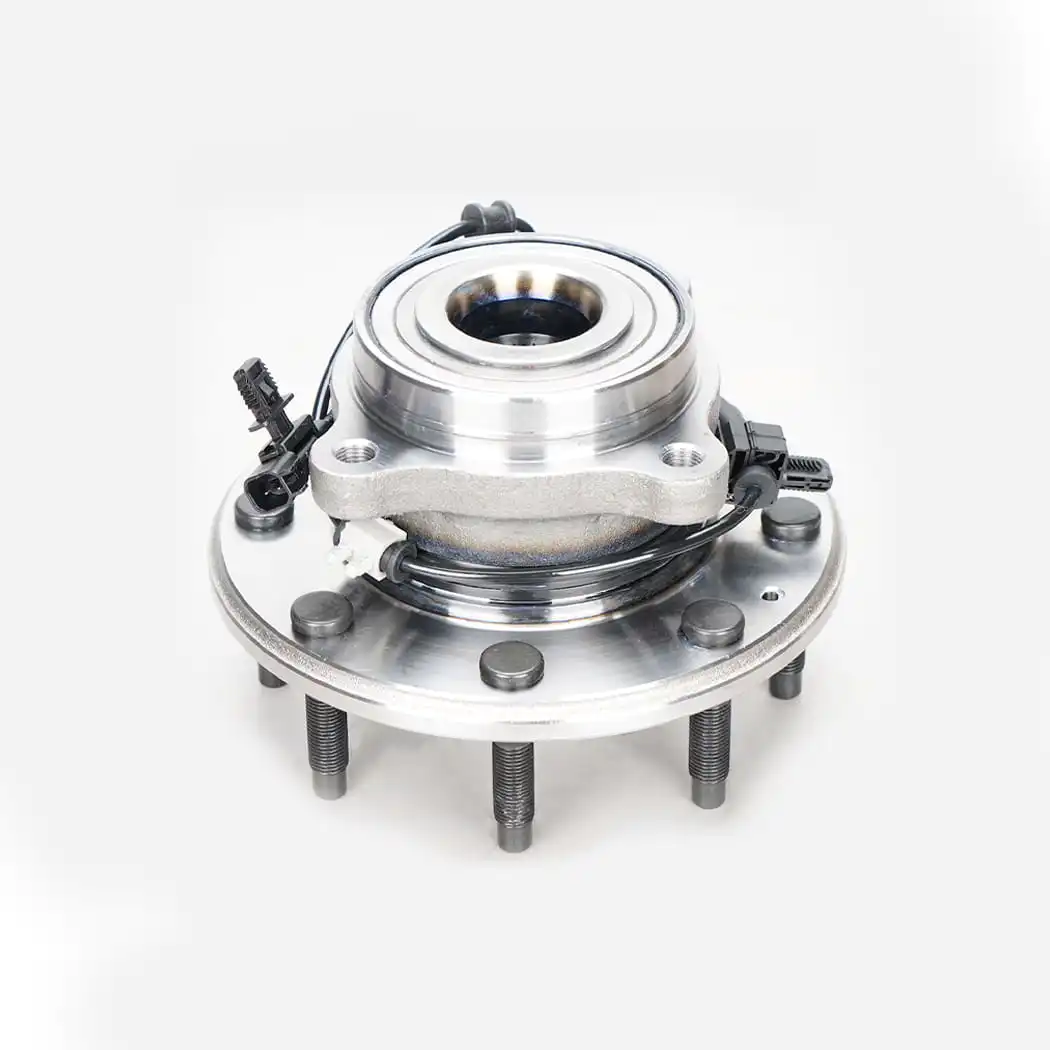
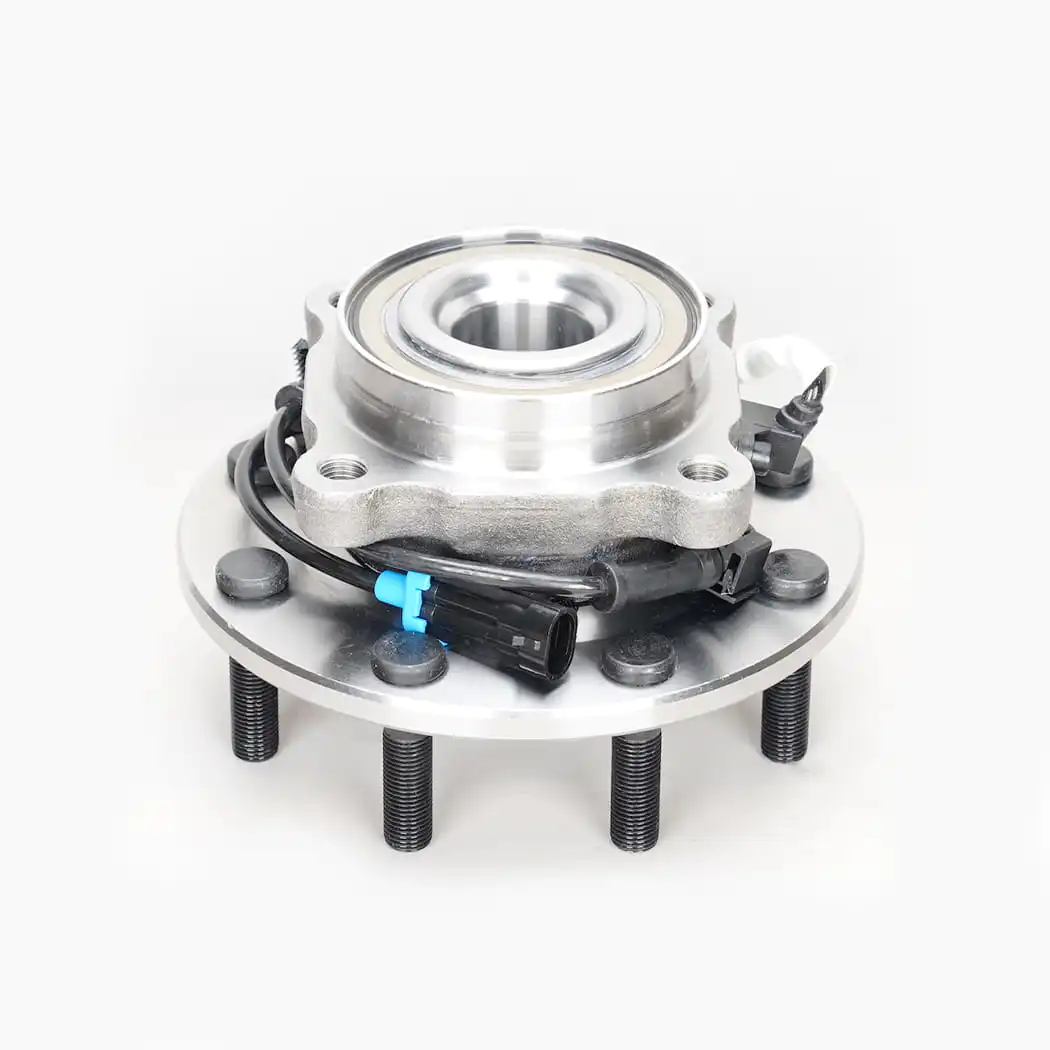
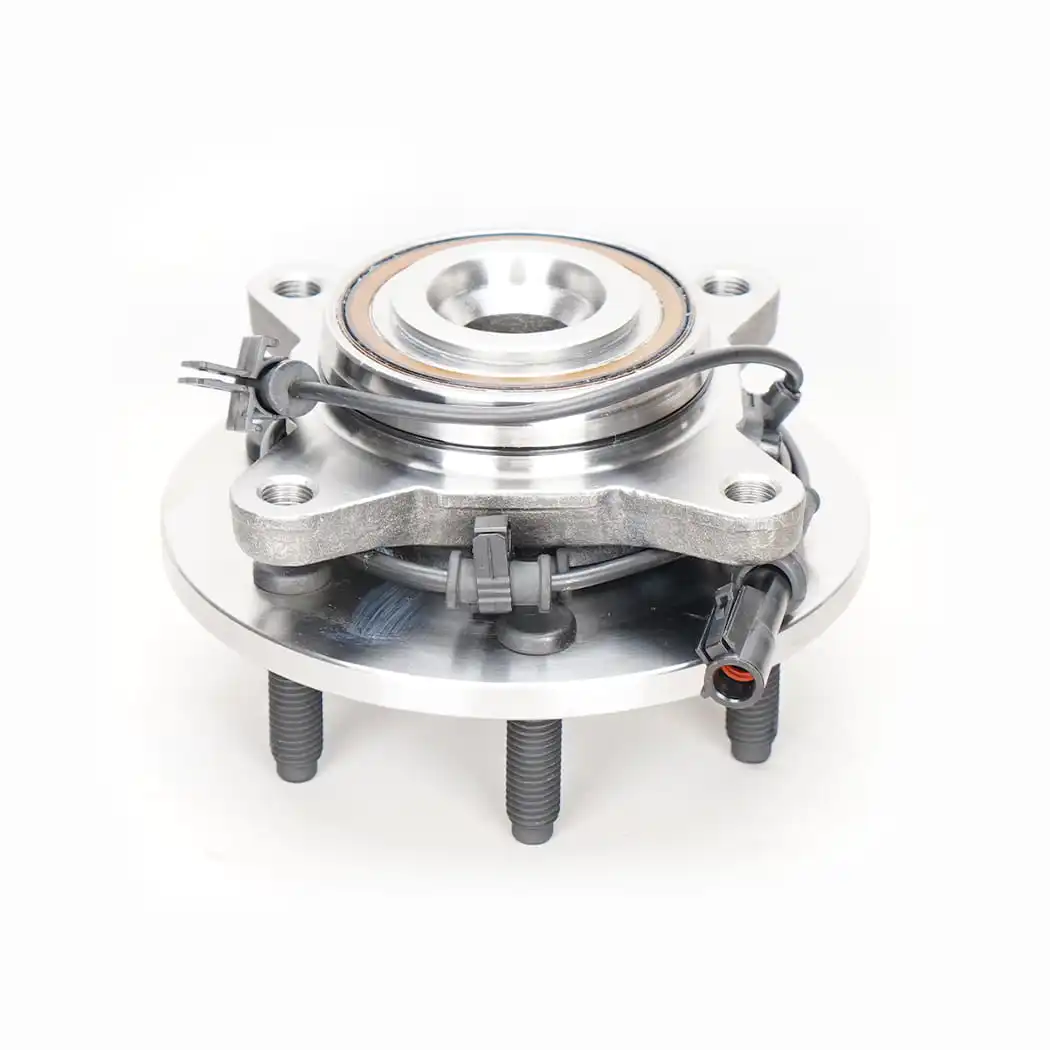
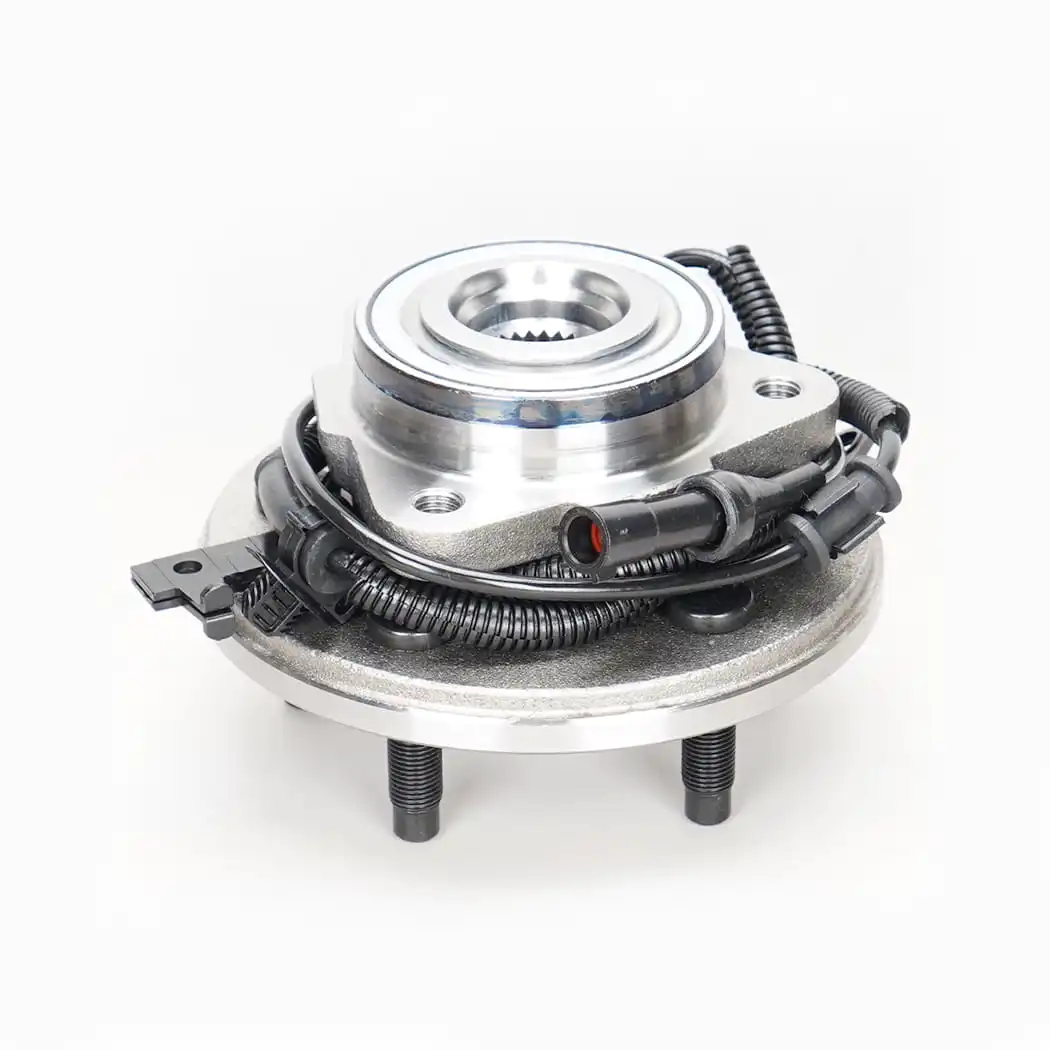
A front hub assembly is the complete rotating unit at the center of each front wheel that mounts the wheel to the vehicle's steering knuckle, supports the vehicle's weight at that corner, and allows the wheel to spin freely on a fixed axis while simultaneously permitting the entire assembly to pivot left and right for steering. On modern vehicles, the front wheel hub assembly is almost always a sealed, unitized component — a single bolt-on unit that combines the wheel bearing, the hub flange where the wheel studs are installed, and an integrated ABS tone ring, all pre-assembled and pre-greased to eliminate the need for field service of the bearing itself. When the bearing inside wears out, the entire front hub and bearing assembly is replaced as one piece.
What makes the front hub assembly mechanically more demanding than its rear counterpart is the combination of forces it must handle simultaneously. In addition to supporting vertical load from the vehicle's weight and horizontal axial loads from cornering, the front hub bearing assembly must also accommodate the steering pivot — which means it is constantly operating at varying angles relative to the knuckle centerline as the driver turns the wheel. On front-wheel-drive vehicles, the front axle hub assembly also transmits engine torque from the CV axle shaft through to the drive wheel, adding torsional loads on top of everything else. This multi-axis loading environment is why front wheel hub bearing assemblies are often slightly more robust in construction than rear units on the same vehicle, and why their failure consequences — including effects on steering precision, braking performance, and ABS function — are immediately felt by the driver.
The front hub assembly looks like a simple disc from the outside, but its internal construction is engineered precisely to manage multiple simultaneous load directions. Understanding what's inside clarifies why the component fails the way it does and why proper installation is non-negotiable for achieving full service life.
The bearing in a modern front wheel hub assembly is almost universally a double-row angular contact ball bearing — a configuration that handles radial loads (vehicle weight pressing down), axial loads in both directions (lateral cornering forces from either side), and moment loads (bending forces generated during steering) within a compact sealed package. The double-row arrangement means two rings of balls operate side by side with opposing contact angles, sharing loads between them and inherently balancing the bearing against axial thrust from either direction. The entire assembly is sealed with low-friction lip seals on both sides that retain the factory-packed synthetic grease for the life of the bearing and exclude the road contaminants — water, salt, dirt, and brake dust — that would otherwise rapidly degrade the bearing surfaces.
The hub flange is the outward-facing mounting surface where the brake rotor and wheel sit. Pressed into this flange are the wheel studs — the threaded posts the lug nuts tighten onto. Flange face runout, measured as total indicated runout (TIR) relative to the bearing's rotation axis, directly determines whether the vehicle will suffer from wheel and brake rotor lateral runout. Quality front hub assemblies are manufactured to very tight runout tolerances, typically under 0.002 inches TIR, because even small amounts of flange runout amplify through the brake rotor into a pedal pulsation that feels like warped rotors even when the rotors themselves are perfectly flat. This is why replacing a failed front wheel hub assembly with a low-quality part can result in a vibration complaint that follows the repair.
Integrated into or onto the front axle hub assembly is a tone ring — a precision-machined ring with evenly spaced teeth or magnetic poles that the ABS wheel speed sensor reads as the hub rotates. This signal is the foundation of the ABS, traction control, electronic stability control, and on modern vehicles, the torque vectoring and advanced driver assistance systems. The accuracy of the speed signal depends on the tooth spacing being uniform and the air gap between the sensor and the ring remaining consistent. Bearing wear that allows radial play in the front hub bearing assembly varies this air gap with every wheel rotation, generating a noisy, inconsistent sensor signal that triggers fault codes and disables safety systems before the bearing itself has reached catastrophic failure.
Front hub bearing assembly failure is progressive — it develops over thousands of miles and announces itself through a sequence of symptoms that escalate in severity. Identifying the problem early and acting on it prevents the situation from progressing to a safety-critical failure mode.
The hallmark symptom of a worn front wheel hub bearing is a low-frequency hum or growl that rises and falls directly with vehicle speed, regardless of what the engine is doing. The noise comes from the worn bearing surfaces — as the balls roll over micro-pitting and spalling on the bearing races, they generate vibration that the hub and knuckle transmit into the chassis and cabin as audible sound. At early stages this may only be noticeable above 45 mph on smooth pavement. As the bearing deteriorates, the noise becomes obvious at lower speeds and in more driving conditions. Performing a lateral swerve on a quiet road — gently shifting the vehicle's weight from side to side — shifts the load between the front bearings: if the noise increases when weight loads the right side (swerving left) and decreases when weight loads the left side, the right front hub assembly is failing. The opposite pattern indicates the left side.
Because the front hub assembly is directly connected through the steering knuckle to the steering linkage, bearing-generated vibration transmits into the steering wheel more readily at the front than at the rear. A worn front hub bearing assembly can produce a steering wheel shimmy or buzz that appears at specific speeds or across a broader speed range as wear advances. This symptom overlaps with several other potential causes — tire imbalance, wheel runout, and worn tie rod ends among them — which means front hub bearing vibration must be distinguished from these other sources through careful inspection rather than assumed. However, if the shimmy is accompanied by any audible noise or by play detected during a wheel-rock test, a front hub replacement diagnosis becomes much more certain.
A front wheel hub assembly that has developed bearing play sufficient to generate erratic wheel speed sensor signals will set fault codes in the ABS and stability control modules before the mechanical symptoms become severe. The ABS warning light, traction control light, and stability control indicator may illuminate individually or in combination, depending on how the vehicle's systems are architected. A diagnostic scan that identifies a wheel speed sensor fault at a specific corner — without any wiring damage or connector issue at the sensor itself — strongly implicates the front axle hub assembly at that corner as the root cause. Replacing the hub assembly eliminates the mechanical source of the erratic signal, and the warning lights should self-clear after a short drive once consistent sensor readings are restored.
In more advanced failure stages, the front hub bearing assembly develops measurable mechanical play. Gripping the tire at 12 and 6 o'clock positions and attempting to rock it reveals axial play in the bearing; gripping at 3 and 9 o'clock tests radial play. Any detectable looseness in a front wheel — particularly on the steering axle — is a serious safety concern requiring prompt repair. Beyond the noise and vibration it generates, a front bearing with significant play can affect steering geometry and introduce unpredictability into the vehicle's handling during emergency maneuvers. A front wheel that has reached the stage of visible wobble during driving represents an imminent failure risk and should not be driven until the front hub replacement is completed.
Most front hub and bearing assemblies are designed to last 80,000 to 150,000 miles under normal conditions, but real-world service lives vary dramatically. Identifying what shortens bearing life helps prevent repeat failures after a front hub assembly replacement.
| Cause | Mechanism of Damage | How to Mitigate |
| Pothole and curb impacts | Brinelling — sudden overload indents bearing races, creating rough rolling surfaces | Avoid aggressive curb strikes; inspect after any hard impact |
| Seal failure and moisture intrusion | Water and salt contaminate grease, corrode races, accelerate fatigue spalling | Use quality sealed-bearing hubs; avoid prolonged deep water crossings |
| Incorrect installation torque | Over-torque collapses internal clearance; under-torque causes fretting corrosion at mounting faces | Always use a calibrated torque wrench to exact vehicle spec |
| Aftermarket wheels with incorrect offset | Increased moment arm on bearing from wheel offset change raises bearing load | Match factory wheel offset or stay within manufacturer's acceptable range |
| Wheel spacer installation | Spacers move the wheel outward, multiplying bending stress at the bearing | Avoid spacers; use correct-offset wheels if track widening is desired |
| Worn or misaligned suspension components | Excessive camber or toe loads the bearing unevenly, accelerating one-sided race fatigue | Perform wheel alignment and inspect all suspension components at hub replacement |
One cause deserving special attention is the combination of worn suspension geometry and a new hub installation. Fitting a fresh front hub bearing assembly onto a vehicle with significantly out-of-spec camber — caused by worn control arm bushings, a bent strut, or a previous collision — subjects the new bearing to the same uneven loading that likely contributed to the old one failing. Performing a four-wheel alignment check and inspecting all surrounding suspension components at the time of a front hub replacement is not an upsell — it is the proper standard of care that protects the new hub's service life.
The lateral swerve test and the wheel-rock test described in the symptoms section provide strong directional evidence, but a thorough diagnosis before purchasing a front wheel hub assembly replacement rules out other components that can mimic bearing symptoms and confirms which corner actually needs attention.
Front hub replacement is a straightforward job on most front-wheel-drive and rear-wheel-drive vehicles with adequate tools and careful attention to torque specifications. Four-wheel-drive front hub assemblies add some complexity around the locking hub or constant four-wheel-drive axle hardware, but the core procedure is the same. Here is what the job involves from start to finish.
Before lifting the vehicle, loosen the lug nuts on the affected wheel while it is still on the ground. On front-wheel-drive vehicles, the large axle nut in the center of the hub — typically 30mm to 36mm, torqued from 150 to 250 ft-lbs — must also be loosened with the vehicle's weight holding the hub stationary; attempting to loosen this nut with the vehicle on jack stands is usually unsuccessful without a special hub-holding tool. Have a calibrated torque wrench that covers the full range from the caliper bracket bolts (usually 80–120 ft-lbs) through the axle nut torque, a hub puller capable of extracting a hub that has seized in the knuckle bore, wire brush and penetrating oil for the knuckle bore preparation, and anti-seize compound for the hub outer diameter on installation.
After safely lifting and supporting the vehicle on jack stands, remove the wheel and set it aside. Remove the brake caliper by unbolting the caliper bracket — do not let the caliper hang by the brake hose; support it with a wire hook from the spring or coilover body. Slide the brake rotor off the hub face. On front-wheel-drive and AWD vehicles, remove the axle nut that secures the CV axle shaft in the hub bore and push the axle shaft inward to disengage it from the hub splines. Unplug the wheel speed sensor connector, noting the routing of the harness so it can be reinstalled in the same path without risk of chafing against moving parts.
The front wheel hub assembly mounts to the steering knuckle with typically three or four bolts accessed from behind the knuckle. These bolts are frequently heavily corroded on vehicles with any significant mileage, and penetrating oil applied ahead of time considerably eases their removal. With all mounting bolts removed, the hub body should pull free from the knuckle bore by hand on a newer, low-mileage vehicle. On any vehicle with more than five or six years of road salt exposure, the hub outer diameter will almost certainly be seized in the knuckle bore by corrosion, requiring a dedicated hub puller to extract. Never use an axle shaft as a drift to hammer the hub out — this damages the CV joint and potentially the knuckle bore surface.
With the old front hub assembly removed, clean the knuckle bore thoroughly with a wire brush and solvent. Inspect the bore surface for any raised corrosion ridges, gouges, or distortion — file down any high spots until the new hub slides into the bore by hand without requiring force. Apply a thin, even coat of anti-seize compound to the hub outer diameter before insertion. Guide the new front hub and bearing assembly into the bore squarely, start all mounting bolts by hand before tightening any of them, then torque them in a cross pattern to the vehicle manufacturer's specification. On driven axles, install a new axle nut — always replace the axle nut, never reuse the old one — and torque it to the manufacturer's spec. Reinstall the brake rotor, caliper, wheel speed sensor connector, and wheel, torquing each fastener to its specified value.
The replacement parts market for front wheel hub assemblies spans a wide quality range, and making the right choice directly determines how long the repair lasts. The following criteria separate reliable replacement hubs from problematic ones:
The work doesn't end when the last bolt is torqued. A few follow-up steps after a front hub bearing assembly replacement verify that the installation was successful and establish conditions for the new hub to achieve its full service life.
Perform a short test drive — starting at low speeds in a quiet area — and listen carefully for any noise from the repaired corner. A new bearing is slightly noisier than a well-worn bearing for the first few miles as any machining residuals on the race surfaces wear in, but this should be a very faint, smooth sound rather than the grinding or growling characteristic of a damaged bearing. If the original noise is entirely absent, the diagnosis and repair were correct. If a similar noise persists, recheck your diagnosis — it is possible the opposite side also had a developing bearing issue that becomes audible now that the louder side has been corrected.
Have a four-wheel alignment performed within the first few hundred miles after any front suspension work that involves removing and reinstalling components that affect wheel geometry. The process of removing a hub assembly, even without disturbing the control arms or tie rods, can introduce small changes in wheel position that accumulate into misalignment over time. Correct alignment reduces bearing loading to its designed level and extends the service life of the new front axle hub assembly, as well as preventing the uneven tire wear that misalignment causes independently.
Recheck the axle nut torque on front-wheel-drive applications after the first 50 to 100 miles of driving. New fasteners can experience a small amount of initial settling — particularly into anti-corrosion coatings — and confirming the axle nut is still at its specified torque at this early stage costs nothing and provides complete confidence that the hub installation is secure for the long term.
• ADD: 42705 Grand River Avenue, Suite 201, Novi. Michigan 48375, USA.
© Copyright 2017 HANGZHOU HANJI AUTO PARTS.CO.,LTD. All Rights Reserved. Wheel Hub Unit Manufacturer